How to Interpret Primary Injection Test Results for Circuit Breakers and Relays?
If you don’t know how to read the test results, you won’t know if your equipment is working correctly. Knowing how to understand the results of primary injection tests is key for making sure your substation is safe. Primary injection testing involves injecting a high current directly into the primary circuit of a circuit breaker or relay.
By doing this, you can check if the devices trip at the right current and time. If the circuit breaker trips too late or not at all, it could mean there’s a problem with the breaker itself or the relay settings. Understanding these results helps you fine-tune the protection system.
Interpreting primary injection test results requires a systematic approach and a good understanding of the expected behavior of circuit breakers and relays.
| Aspect | Description |
|---|---|
| Circuit Breakers | The primary goal is to verify that the circuit breaker trips within the specified time and current parameters. Here’s what to look for: |
| Trip Time: Compare the measured trip time with the manufacturer’s specifications and the protection relay settings. Significant deviations may indicate mechanical issues or control circuit problems. | |
| Minimum Trip Current: Ensure that the circuit breaker trips at or above the minimum specified current level. Failure to trip at the correct current may point to problems with the trip coil or latching mechanism. | |
| Protective Relays | The primary injection test verifies that the relay operates correctly and sends a trip signal to the circuit breaker. Key aspects to analyze include: |
| Pickup Current: Verify that the relay picks up (initiates a trip) at the set current level. If the pickup current is too high or too low, adjust the relay settings accordingly. | |
| Time Delay: Check that the relay’s time delay matches the expected setting. Discrepancies in time delay can compromise the coordination between different protective devices. | |
| Overall System Response | Evaluate the coordinated response between the relay and the circuit breaker. The relay should send a trip signal, and the breaker should open within the specified time. Any delays or failures in this sequence require further investigation. |
| Data Logging | Use the data logging capabilities of the primary injection test set to record and analyze the test results. This provides a detailed record of the test and facilitates identifying trends or anomalies. |
| Safety | Always adhere to strict safety protocols during primary injection testing, including using appropriate PPE and following lockout/tagout procedures. High currents can pose significant safety hazards. |
Now that you understand how to read the test results, what are the steps involved in doing primary injection testing?
What are the Steps Involved in Primary Injection Testing?
If you skip a step, you could mess up the whole test. So, let’s make sure you know the right way to do primary injection testing. The steps include preparing the test equipment, disconnecting the equipment to be tested from the system, injecting the test current, and recording the results.
First, you need to make sure your test equipment is ready and calibrated. Then, disconnect the circuit breaker or relay from the rest of the system to avoid any interference. Next, inject the test current and carefully record when the breaker trips or the relay operates. After that, compare your results to the expected values. Primary injection testing involves a series of carefully planned steps to ensure accurate and safe results.
| Step | Description |
|---|---|
| 1. Preparation and Planning | Review the system drawings, protection relay settings, and circuit breaker specifications. Develop a detailed test plan that outlines the test objectives, procedures, and safety precautions. |
| 2. Equipment Setup | Gather the necessary test equipment, including a primary injection test set, connecting cables, and measurement devices. Ensure that all equipment is in good working order and properly calibrated. |
| 3. Isolation and Safety | De-energize and isolate the equipment to be tested from the rest of the system. Use lockout/tagout procedures to prevent accidental energization. Verify that all connections are secure and properly grounded. |
| 4. Test Current Injection | Inject a high current into the primary circuit of the circuit breaker or relay. Start with a low current and gradually increase it until the device operates. Record the current level and the time it takes for the device to trip or operate. |
| 5. Data Recording and Analysis | Record the test results, including the injected current, trip time, and any other relevant data. Compare the results with the expected values based on the protection relay settings and circuit breaker specifications. |
| 6. Verification and Reporting | Verify that the test results meet the acceptance criteria. Prepare a detailed test report that summarizes the test procedures, results, and any corrective actions taken. |
| 7. Reconnection and Energization | After completing the tests, carefully reconnect the equipment to the system. Remove all lockout/tagout devices and verify that the system is operating correctly. |
What Equipment is Needed for Primary Injection Testing?
Using the wrong tools can lead to inaccurate results and safety hazards. Knowing what equipment you need helps ensure the test goes smoothly. You’ll need a primary injection test set, connecting cables, a multimeter, and a timer.
The primary injection test set is the main tool for injecting the high current. Connecting cables link the test set to the equipment being tested. A multimeter helps measure voltage and current. A timer accurately records the time it takes for the circuit breaker to trip or the relay to operate.
Having the right equipment is essential for performing primary injection tests safely and accurately.
| Equipment | Description |
|---|---|
| Primary Injection Test Set | The primary injection test set is the core of the testing setup. It generates high currents to simulate fault conditions. Look for a test set that can deliver the required current range and has accurate timing capabilities. |
| Connecting Cables | Use high-quality, appropriately sized cables to connect the test set to the equipment being tested. Ensure that the cables are in good condition and can handle the high currents without overheating. |
| Multimeter | A multimeter is used to measure voltage and current levels during the test. It can help verify that the test set is delivering the correct current and that the circuit breaker or relay is responding as expected. |
| Timer | A precise timer is essential for accurately measuring the trip time of the circuit breaker or the operating time of the relay. |
| Current Transformers (CTs) | In some cases, you may need to use current transformers to step down the high currents to a level that can be safely measured by the test equipment. |
| Safety Equipment | Always use appropriate safety equipment, including insulated gloves, safety glasses, and a grounding kit. |
| Data Logger | Some primary injection test sets have built-in data loggers that can record the test results automatically. This can save time and reduce the risk of errors. |
What are the Benefits of Primary Injection Testing?
If you’re not sure why you’re doing a test, it’s easy to think it’s not important. But understanding the benefits of primary injection testing can show you why it’s worth the effort. Primary injection testing helps find problems with circuit breakers and relays before they cause bigger issues.
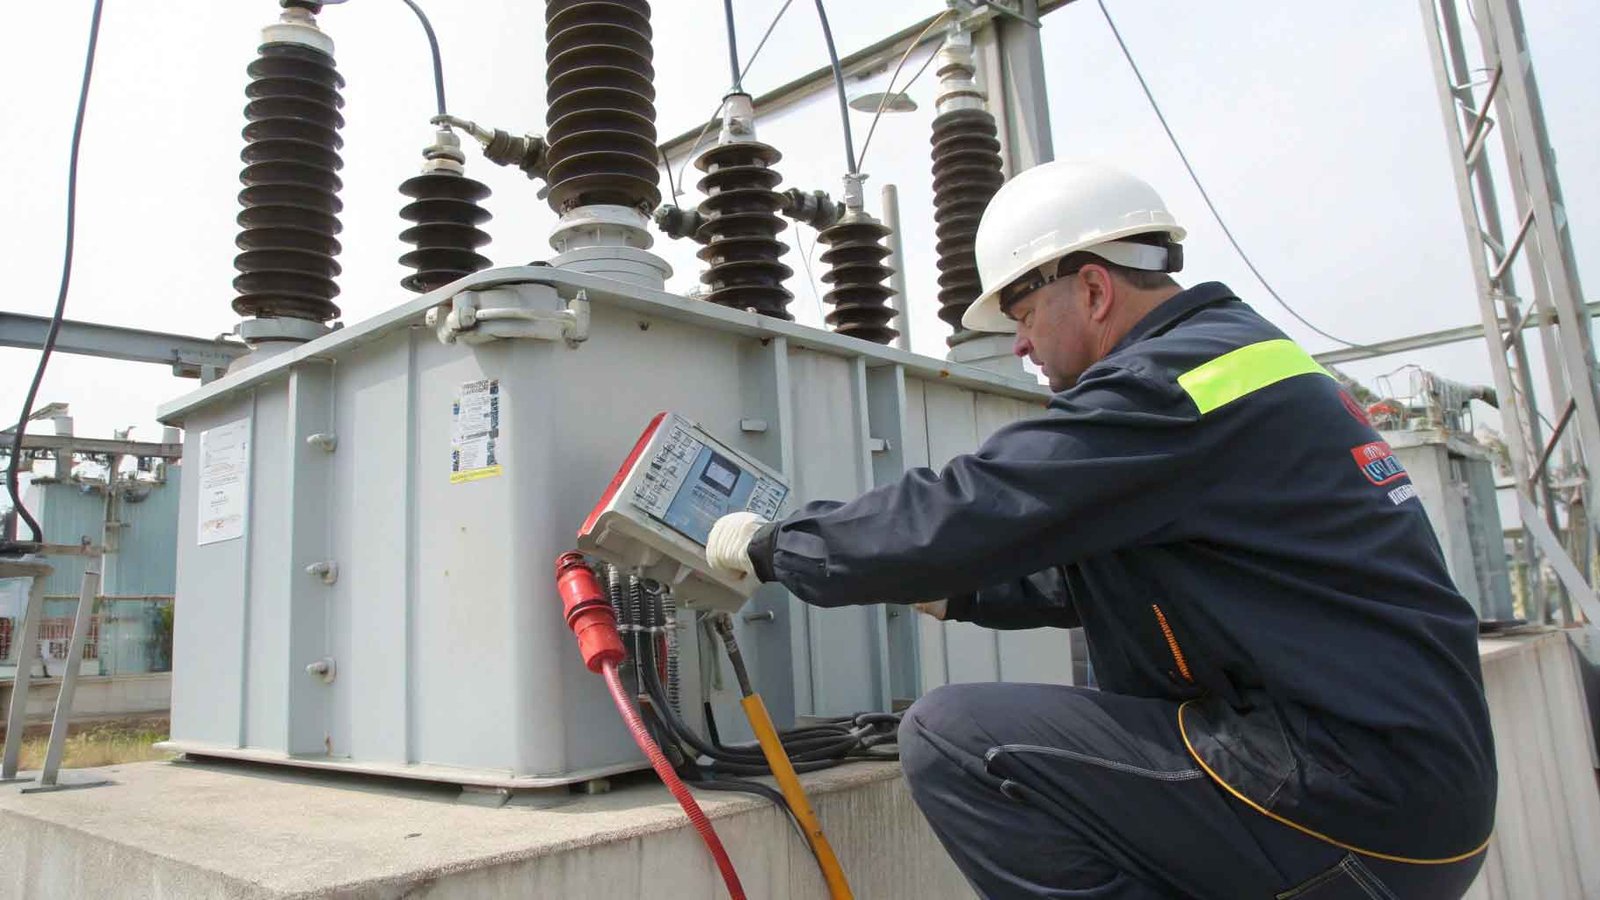
It makes sure the protection system works right, which keeps the electrical grid safe and reliable. By doing these tests, you can avoid blackouts and equipment damage. [image placeholder] Dive Deeper: Primary injection testing offers several key benefits for ensuring the reliable operation of electrical substations and power systems.
| Benefit | Description |
|---|---|
| Verification of Protection System Performance | Primary injection testing verifies that the protection system is functioning correctly and that the circuit breakers and relays are operating within their specified parameters. |
| Early Detection of Potential Problems | By simulating fault conditions, primary injection testing can identify potential problems with circuit breakers and relays before they lead to equipment failures or power outages. |
| Improved System Reliability | Regular primary injection testing can improve the overall reliability of the electrical system by ensuring that the protection system is always ready to respond to fault conditions. |
| Enhanced Safety | Primary injection testing can help prevent electrical accidents and injuries by verifying that the protection system is operating correctly and that circuit breakers are tripping quickly in the event of a fault. |
| Compliance with Standards | Many industry standards and regulations require primary injection testing as part of routine maintenance and commissioning procedures. |
| Cost Savings | By detecting potential problems early, primary injection testing can help prevent costly equipment failures and power outages. |
Conclusion
Primary injection testing is essential for keeping substations safe and reliable. Understanding how to read the test results, following the right steps, using the right equipment, and knowing the benefits can help you make sure your electrical system works as it should.